
How to make Ladybug Maracas!


For a complete supply list, please visit Cassidy’s event page.
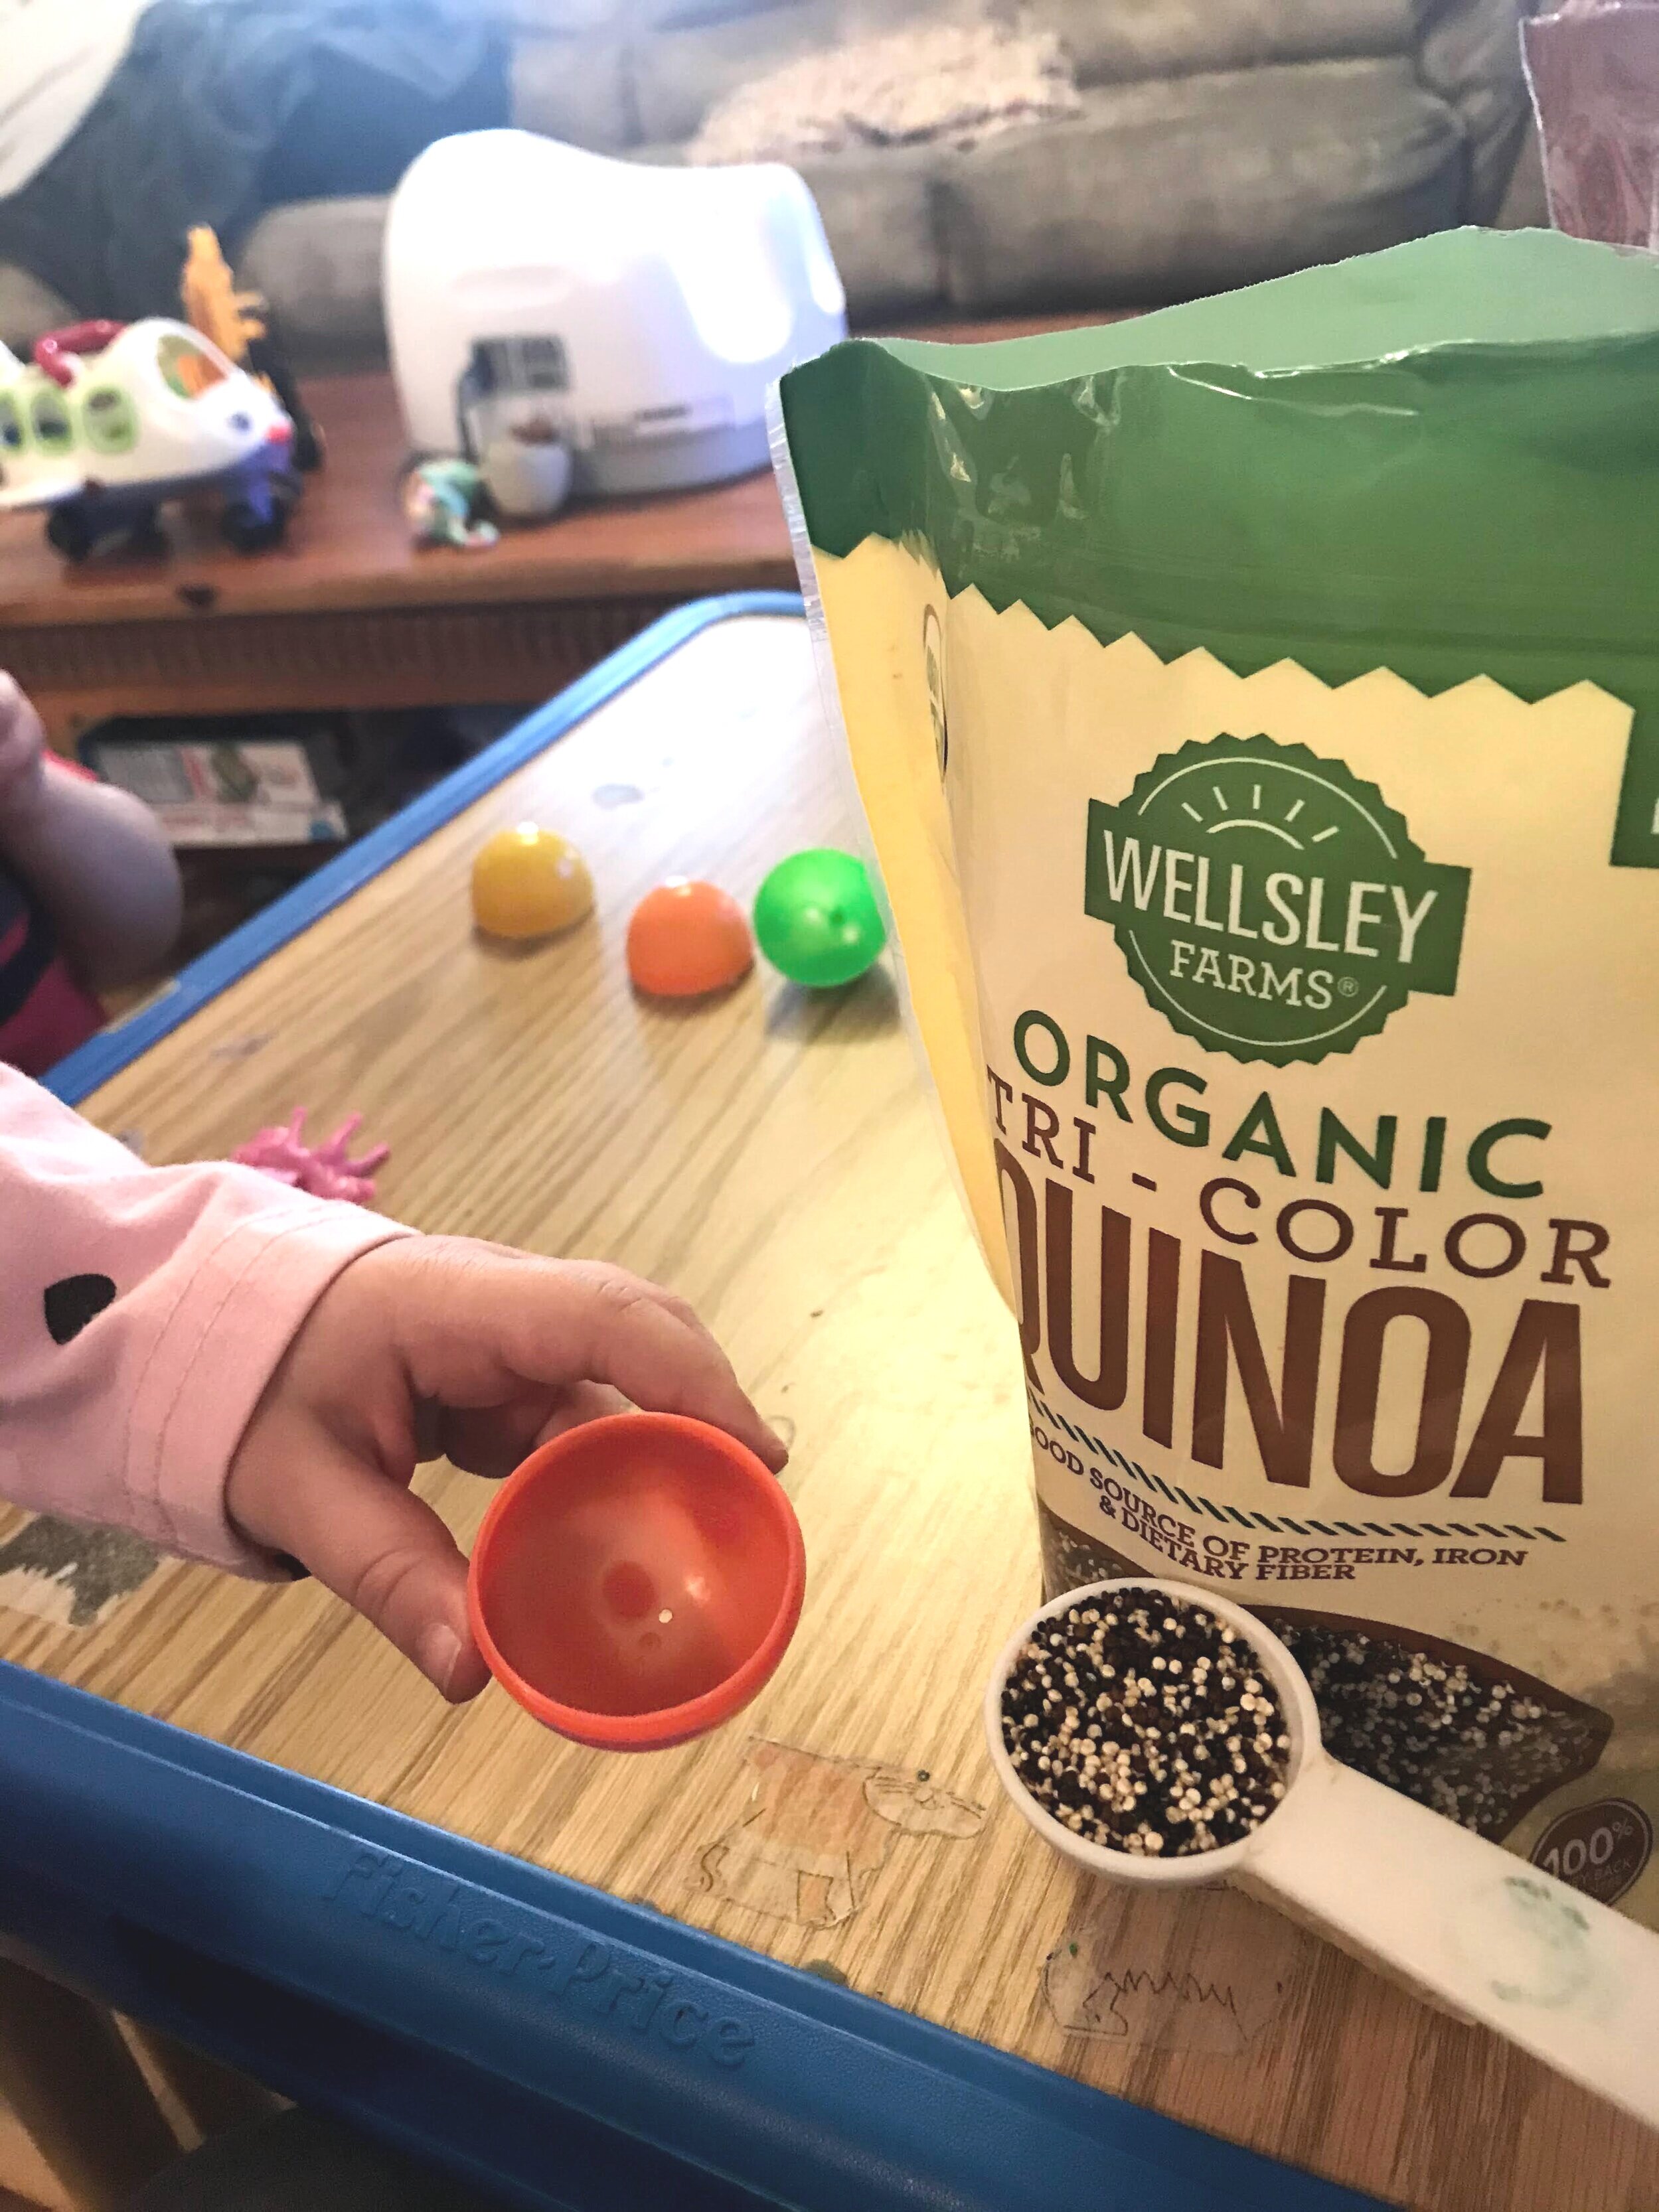
STEP 1. GATHER YOUR 2 EGGS, OPEN THEM, FILL WITH 1 TBSP OF A SHAKEY FILLING OF YOUR CHOICE. Brody filled his with rice and Cassidy chose quinoa.
STEP 2. After filling, apply hot glue (or glue of your choice) around the edgeS of the eggS. Close the eggS and wait for the glue to dry.

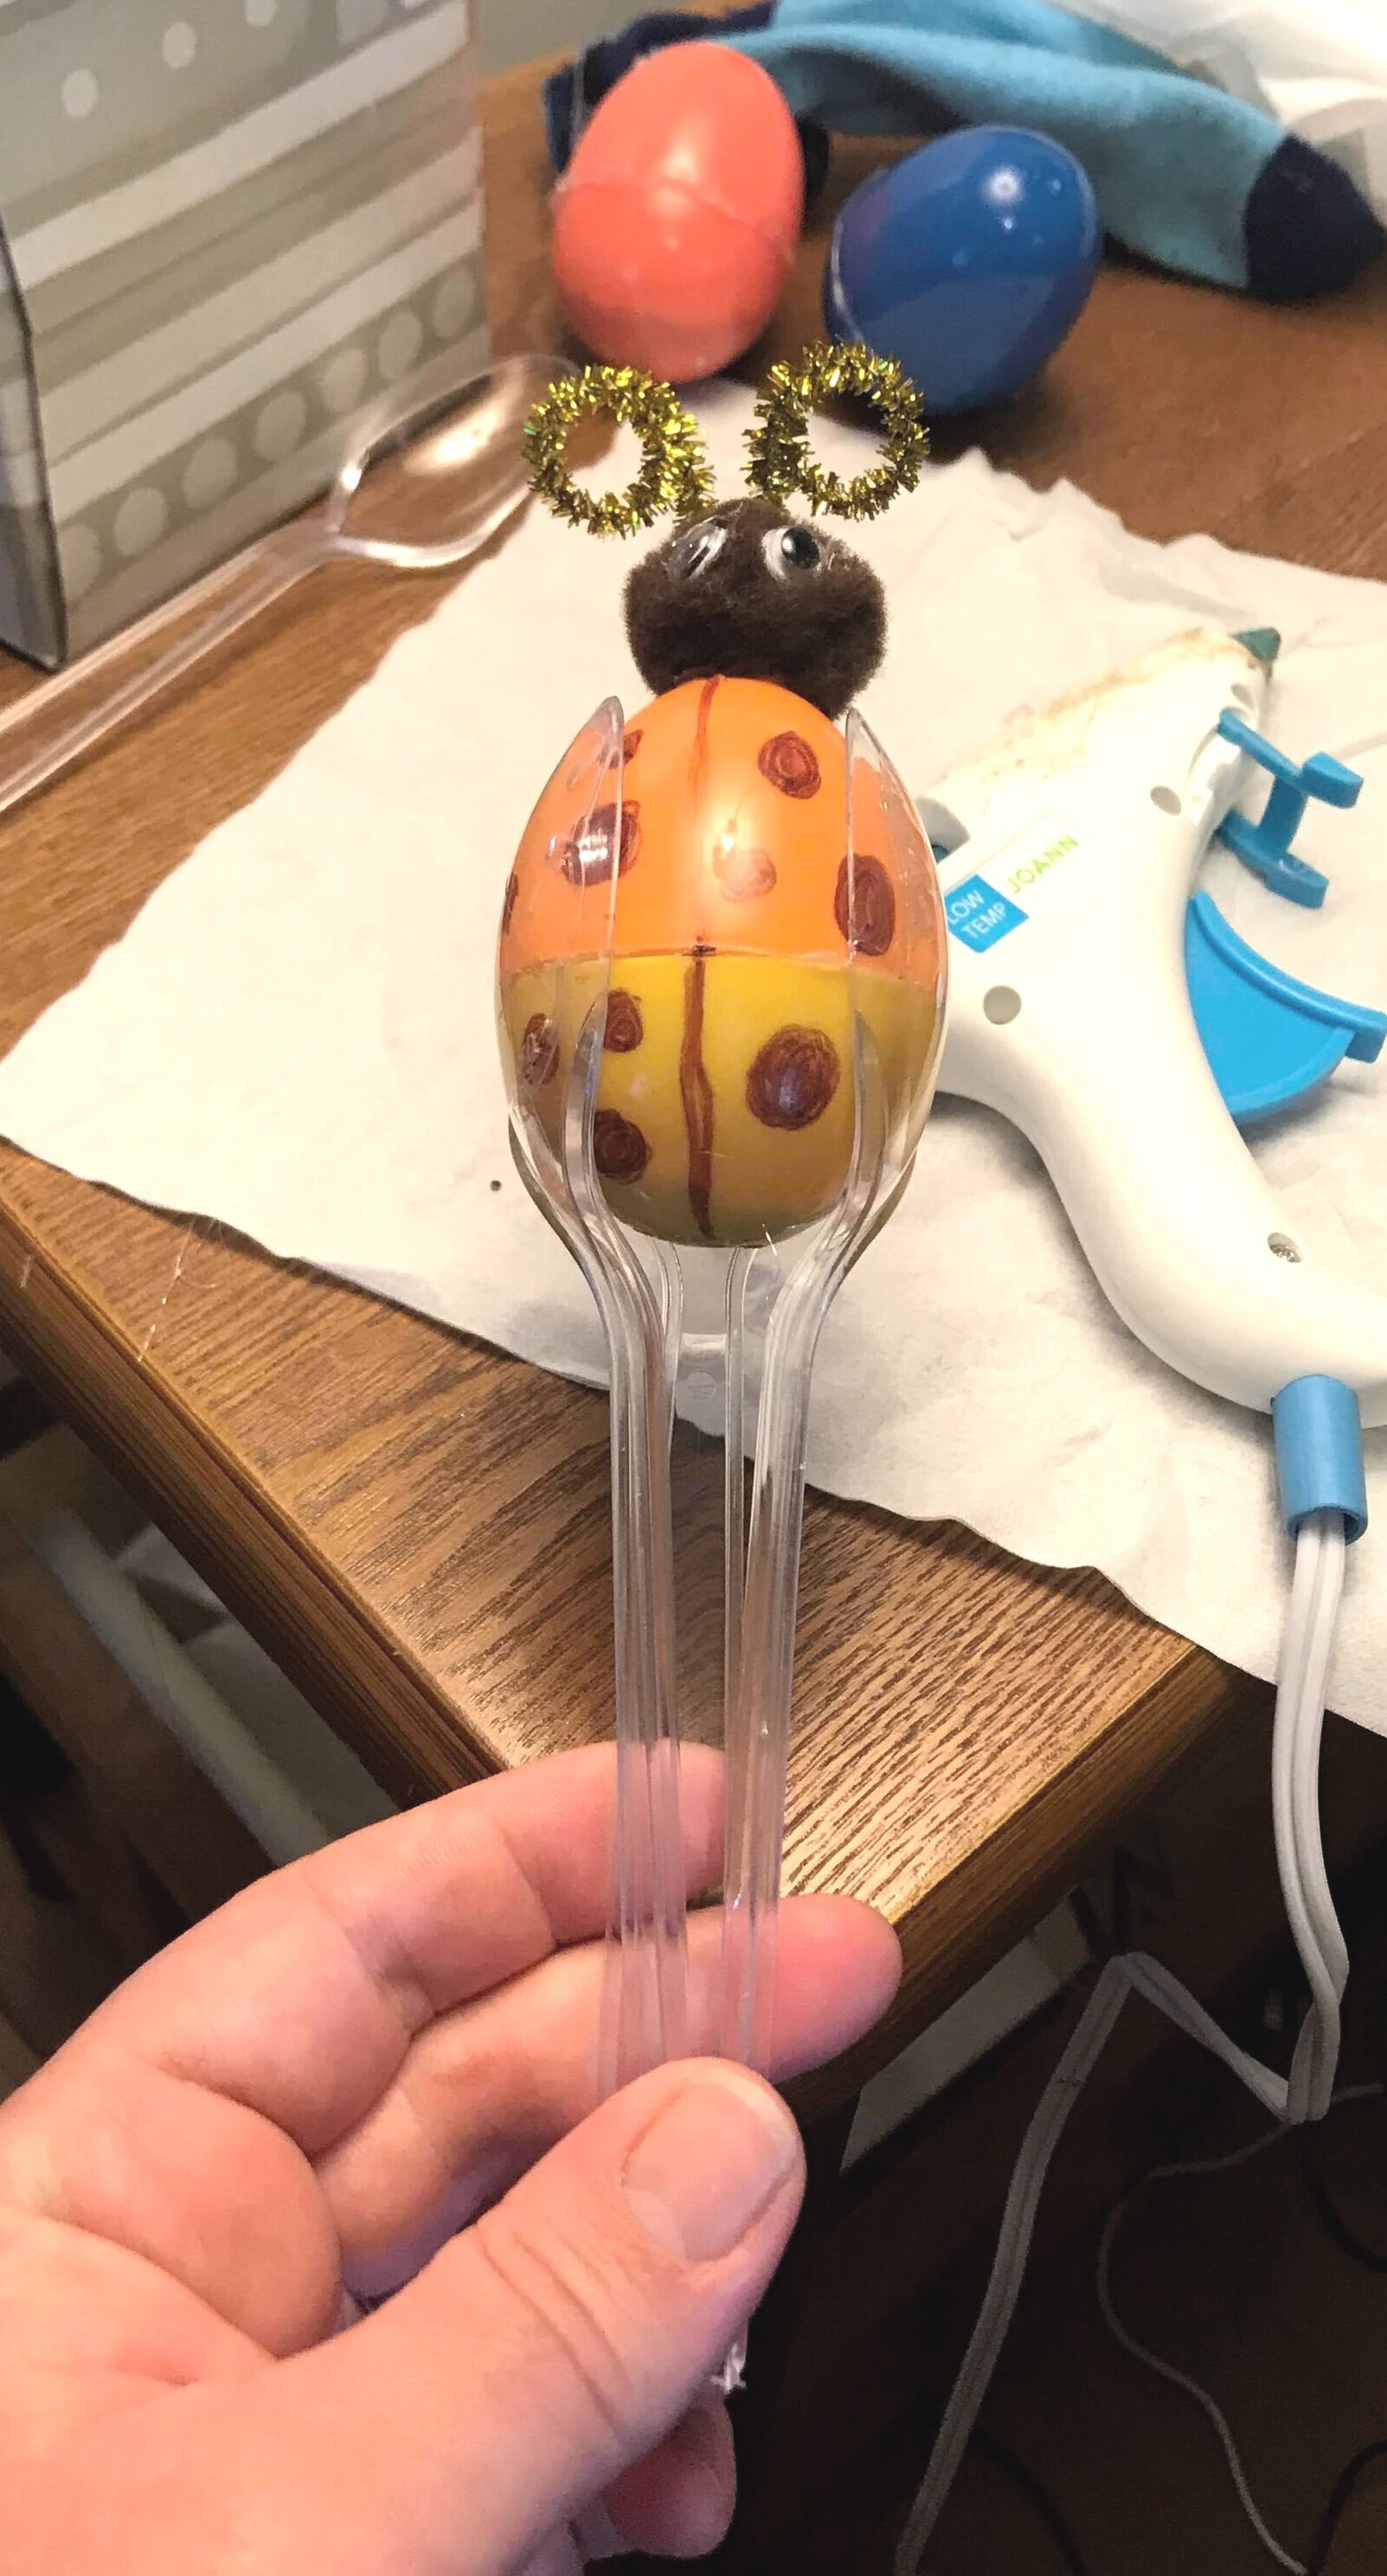
STEP 3. After the glue dries, take a sharpie and draw the midline and dots of your ladybug. I did this for Brody (2.5yo) but Cassidy was able to handle this step fine on her own.
You can also get creative here and use different materials for the dots; puff paint, pieces of paper, etc.

STEP 4. Glue the googly eyes onto the medium-sized pom-pom. Glue the pom-pom to the smaller end of the egg for the ladybug head. So cute!!!

STEP 5. Create antennae from the pipe cleaners bY cutting 2 - 3” pieces. Curl the ends of the pipe cleaners (I wrapped it around the sharpie).

STEP 6. Twist the non-curled ends of the pipe cleaners together and glue them to the back of the ladybug head.

step 7. Apply glue to inside of spoons. Attach to sides of ladybug shakers so the ends of the spoons come together to form a handle. You can use 2 or 3 spoons ( we used 3).
*If not using hot glue, you can also wrap your spoons around your ladybug with washi tape.
step 8. Wait until the glue dries and then SHAKE IT!!!
We had fun listening and feeling the differences between the filling inside!
**To order a craft pack with all the supplies needed, click here…
